Phase III: Building & Installing Cabinets & Shelves
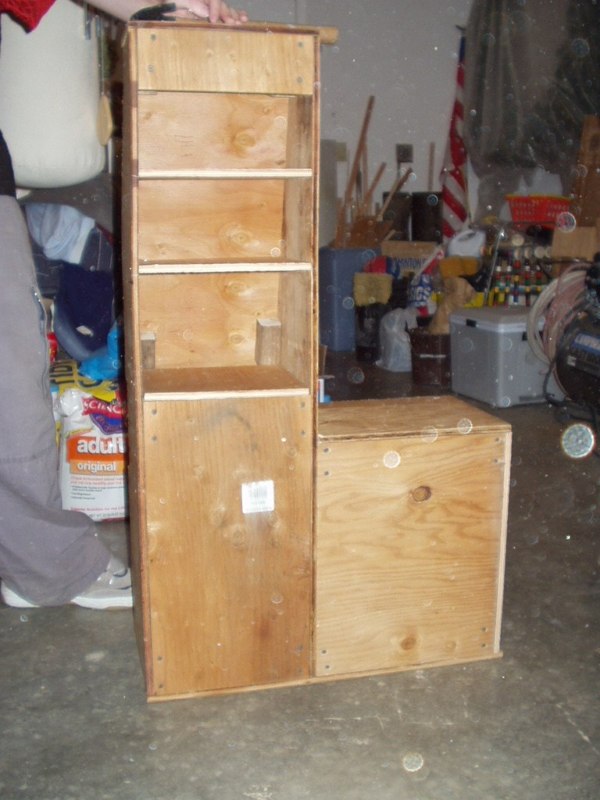
I decided on building two hi/lo cabinets to take advantage of the walls space and the available wasted floor space, and an overhead cabinet/console for storing books, tapes, cds, and the small hand-held CB for contacting the driver with. The overhead doubles as the mount for the rear stereo system and the main wiring junction box for everything in back.

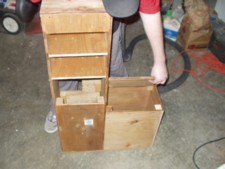 The left cabinet in the picture above, I built as a pantry cabinet, using its lower box to store the griddle, plastic plate holders, wash basin and other odd sized objects, that were too wide or too tall for the tall cabinet. As you can see in the bottom of the image, I made the bottom most shelf removeable so I could get at the items stored in the bottom and still take advantage of space. The lower cabinet is used for storing the mixing bowl, utensils, the butane lighter, and other small odds and ends.
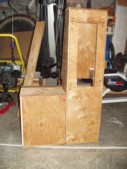 The right tall cabinet will be used for storing the more dirty things, such as the posts for the eating canopy, the propane tree for the lantern, hoses for hooking things up, paper towels, tools, flashlight. The lower one will store things like duct tape, happijac tiedowns (Gotta keep them somewhere till I can get a real camper!), and batteries for the flashlight wrapped in double lunch sacks.
-closeup.jpg) The final cabinet to be built was the over-head cabinet. This cabinet houses the main wiring harness for the entire mini-camper, along with the two front speakers. This cabinet was built
The final cabinet to be built was the over-head cabinet. This cabinet houses the main wiring harness for the entire mini-camper, along with the two front speakers. This cabinet was built -closeup.jpg) much the same as the other two, out of half-inch plywood and left-over paneling from the walls.
Since this cabinet is actually mounted to the camper shell itself, I need to keep its construction fairly light, so the unit's back is just the wall of the camper shell itself, and the face on the front, except for the doors, is just paneling fastened in the corners by either screws or finish nails. To attach it properly to the canopy, it was built so that it could be fastened directly to the 1" tubing of the canopy frame with tapping screws and mini L-brackets, six in total.
much the same as the other two, out of half-inch plywood and left-over paneling from the walls.
Since this cabinet is actually mounted to the camper shell itself, I need to keep its construction fairly light, so the unit's back is just the wall of the camper shell itself, and the face on the front, except for the doors, is just paneling fastened in the corners by either screws or finish nails. To attach it properly to the canopy, it was built so that it could be fastened directly to the 1" tubing of the canopy frame with tapping screws and mini L-brackets, six in total.
.jpg) As I mentioned in the plan for this project, that I was going to be adding a second stereo in the back for independent use, along with toggle switches for selecting between the cab stereo and the rear stereo. In the center of the console was frame the space for housing the stereo, along with the toggle switches for selecting the front or back. You can actually shut off one whole side of the vehicle or choose to have to different feeds going at the same time (don't know why you would though). Due to the different speaker wiring styles for the two stereos, I was not able to make a single combined switch to go between the two, so I had to use two.
As I mentioned in the plan for this project, that I was going to be adding a second stereo in the back for independent use, along with toggle switches for selecting between the cab stereo and the rear stereo. In the center of the console was frame the space for housing the stereo, along with the toggle switches for selecting the front or back. You can actually shut off one whole side of the vehicle or choose to have to different feeds going at the same time (don't know why you would though). Due to the different speaker wiring styles for the two stereos, I was not able to make a single combined switch to go between the two, so I had to use two.
The blue toggle in the picture on the left below the stereo is meant for the electric heater that will eventually go in the back, there will likely be a subject in the projects section later on about its installation. After one camping trip with 20 degree nights, it was decided that a SAFE way to heat the back a bit (Not all Night) was needed. At the time this was built, the heater was a "maybe" item, and was wired for as such. The other item installed on the cabinet is in the center, hanging just below it. I found at my local Bi-Mart a two receptacle plug for around $5 that simply needed to be wired in and screwed in place. It came with an in-line fuse for the outlets, so that any devices plugged in are protected. It works great for running things like a CD-player, cell-phone charger or other low amperage device. High amperage 12 volt items still use the side outlets, as the wiring for the dual outlet will not supply enough current to run them.
.jpg)
.jpg) Another part of the project I had made mention of was adding a wireshelf over the top of the rear cabinets for storing the extra items for a camping trip, like the stove, the table canopy and other lightweight short odds and ends.
Another part of the project I had made mention of was adding a wireshelf over the top of the rear cabinets for storing the extra items for a camping trip, like the stove, the table canopy and other lightweight short odds and ends.
Installing that shelf was a lot more painful that it looks, the clearance between the shelf and the ceiling didn't allow for the use of a regular screw driver or even the 90 degree adapter for the drill, so using a small dual headed driver that came with a garbage disposal, I carefully had screwed each one of the tiedown bars to the tops of the cabinets. Took roughly 2-3 hrs due to my hands cramping.
|


-closeup.jpg)
-closeup.jpg)
.jpg)
.jpg)
.jpg)